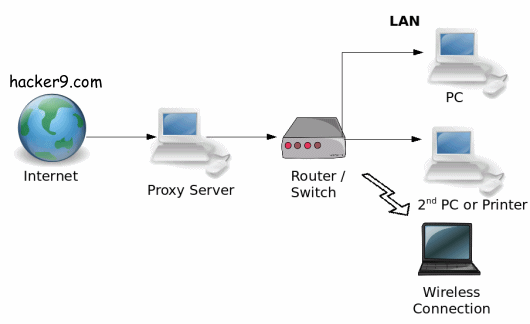
Proxy site allows you to access Blocked or restricted sites. Normally Schools, colleges and even some offices block or restrict certain websites for example “Social Networking” sites like facebook, twitter, etc. There are thousands of proxy sites available. But the one thing which is common in all the sites is that they also show you loads of advertisements, which is quite Frustrating. and also there is possibility that the admins form schools and offices might have already blocked some common proxy sites.
Our Proxy Site: Surf.hacker9.com
 In this Tutorial am going to show you how you can create your own proxy server site and unlock all the restricted sites. we will see two methods. you can try whichever you feel easy to go with.
1. Using Glype proxy script (Free Proxy Project)
2. Using Google Apps engine (inbuilt project)
So lets start with Method #1 since it is easy and quick.
 -Using Glype proxy script
This method requires you to have a “Webhosting account” (which is free and quite simple to register) and a “Glype proxy script” file.
note: The Problem with free hosting is that, as soon as they come to know that you are using Proxy Script, they will Ban you. so the Smart choice is to Get a Paid hosting account for 1 month, costs just $4/month ( $25 in Discount, for 1 year)
Step 1. Just download the Glype proxy script Zip file and don’t bother to unzip it.
Step 2. The next step is to Get a Web-hosing account with Subdomain. In this tutorial i have used 000webhost.
Recommended: Hostgator WebHosting (20% off coupon code- Spring)
note: Do not use ‘proxy’ word in the subdomain while registering for free webhosting account, you will get banned. instead use your name.
Step 3. After your account gets Active, just Login to your “Control Panel” and Click on “File manager”. This will Show you the directories.


Step 4. Click Open “Public_html” Directory and then click “Upload” button.

Step 5. Now in the Archives(zip,tar) Section, browse and locate your downloaded glype-1.1.zip file and Click “Green Check Button” (See the Screen Snap)
Step 6. After Uploading Just visit your website in the new tab and You should now see your own Proxy site.
Step 7. Just type in any web address and see if it works, that’s it.
 -Using Google Apps engine
This method is quite difficult but doesn’t require a “webhosting account” account. all you need to have is ‘Google account’.
Step 1. Download Python 2.6.4 from here and Install it. Google Apps engine requires “Python” to Run, which acts as a platform.
(Windows user’s click on “Windows x86 MSI installer(2.6.4)(sig)”)
Step 2. Once you install Python 2.6.4 on your PC, the next step is to download the “Google apps engine SDK” for python (URL):
Step 3. Now launch the “Google apps engine” that you just installed on your PC.
Step 4. This step is to Download “Python proxy Script” which you can load here. After downloading just extract it to “Desktop”.
Step 5. After doing step4 just Go to http://appengine.google.com and sign in with your Google account.
Step 6. Click on “Create an application”(verify your account) and give a name and title to your app and save it.
Step 7. Now go back to your “Google apps engine” that you launched in step3 and click on file >> Add existing application. Now in the pop-up box select the extracted “Python proxy Script” file that you just created in step4 and click “ADD”.
Step 8. After clicking “ADD”, select ‘your_app_id’ and Click on ‘Edit’ icon. In the Application field replace “your_app_id” with the name of your app that you saved in step6.
Step 9. After editing, close the Edit window and Click on “Diploy” icon. Now enter your Google account and click Ok.
Step 10. Now Go back to your web Browser and Enter your App URL for example mine is hacker9proxy.appspot.com. you should now see your proxy server.
Note: Keep your proxy site secret. Never tell your proxy URL to your Classmates or Colleagues because if admin of your organization comes to know about this, he will certainly block or restrict your proxy site.
I hope you are done with your proxy server. If Any doubts or difficulties, your comments are appreciated.
No comments:
Post a Comment